Grow parsnips
Growing perfect parsnips is all about preparation, precision and patience. Sue Linn learns some time-honoured tricks.
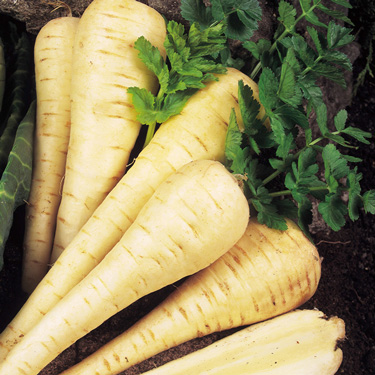
This will be my year of upholding a family tradition and growing a respectable crop of parsnips. I learned to love their sweet nutty taste as a child, thanks to the proficient vege gardeners in my life. Here’s how my grandfather grew his parsnips, as passed on to me by my father.
First get your row sorted. Once the soil has dried enough so that it doesn’t stick to the spade, carefully prepare your parsnip bed: you need about a spade’s depth of loose crumbly soil without hard clods or stones. It must be well drained, but a heavier soil with reasonable clay content is good as clay particles hold moisture.
Don’t add fertiliser or compost at this stage. High nitrogen levels cause forked roots. Ideally sow your parsnips in soil that was used for a well fed crop (such as beans or salad greens) the year before.
Wait until the soil has warmed to at least 10ºC. In colder climates with short summers it’s best to sow parsnip seed a week or two after the last frost has passed to allow plenty of growing time before autumn frosts. In warmer climates waiting till late spring or early summer can give a better result. Rake out a shallow trench (1-2cm deep) and use a plank of wood (about 15cm wide) to make a smooth even surface.
Sow your seed, which must be fresh. Grandpa sowed his quite thickly (about 1cm apart) to compensate for erratic germination (some gardeners recommend pre-sprouting on damp paper towels). Cover the seeds with a thin layer of soil then place the board on top and walk over it to make sure the seeds are sitting snuggly in the soil. If there is too much air around the seeds they can dry out.
Watch and weed. It is important to keep the row free of weeds until the parsnip leaves are big enough to shade out the weeds.
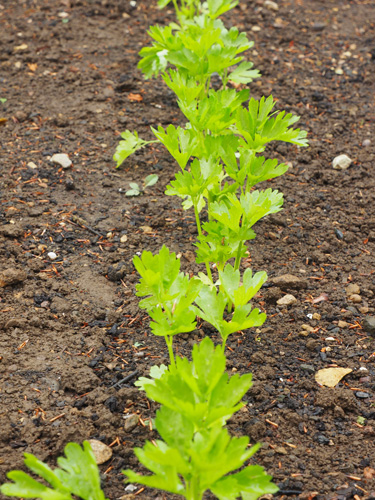
Start thinning when the seedlings have their first two true leaves. The tap roots grow strongly during these early weeks and you need to give them room to grow. At first, thin them to about 3cm apart. Thin again when the leaves are touching.
Keep thinning until your parsnips are about 10-15cm apart. Later, thinnings may be big enough to roast.
Water as often as needed to keep the soil constantly moist. To cut down on watering (and weeding) mulch with straw or lawn clippings mixed with chopped up leaves.
After a couple of frosts your mature parsnips will be full of flavour and ready for harvest. But there is no need to dig them all at once. They’ll sit happy in the cool winter soil, converting their starches into flavour and sweetness, until you are ready to eat them. No need to let them turn dry and rubbery in the fridge.
If your parsnips are small and grown in a very light soil, you may be able to pull them out like carrots. More likely you’ll need to dig to avoid damaging them.
There is much pride in growing a perfectly formed root vegetable, but if your parsnips do end up misshapen and hard to peel, rest assured they will be no less tasty and nutritious.
A worse disfigurement is the work of carrot rust fly larvae, which hatch from eggs laid in the soil to feed on our root crops. Crop rotation combined with an insect mesh cover gives a good measure of protection against these vandals, as does companion planting with the likes of rosemary, sage or onions. These strongly aromatic plants disguise that scent of carrots and parsnips, which the adult rust fly is attracted to. Mulching with fresh grass clippings also helps mask the scent.
Tip: Sow carrots or parsnips between rows of spring onions to help repel carrot rust fly.
Worth knowing if you want to grow parsnips:
- Parsnips take time. Most varieties need at least six months from sowing till maturity. Seed can take up to a month to germinate and not every seed will germinate at the same rate.
- Parsnip seed doesn’t keep. They quickly lose viability so use fresh seed no older than a year after harvest.
- Parsnip seed will not germinate in cold soil. Planting too early in spring is a waste of time. Wait till the soil has warmed to a steady 10 degrees.
- Parsnips taste best after frost, which converts the starches into sugars.
- Parsnips need constant moisture. They are less forgiving of dry soil than most other crops.
Plant in spring
Sow direct
Peas, lettuce, rocket, silver beet, spinach, beetroot, radish, carrots, parsnip, coriander, seed potatoes
Sow in trays
Broccoli, cabbage, cauliflower, silver beet, fennel. In October: zucchini, cucumber, tomato, capsicum, pumpkin, eggplant.
Plant seedlings
Spinach, silverbeet, beetroot, lettuce, kale, cabbage, broccoli, parsley, spring onions, chives.
6-Sep-2016


Parsnip seedlings


