Nurturing nature
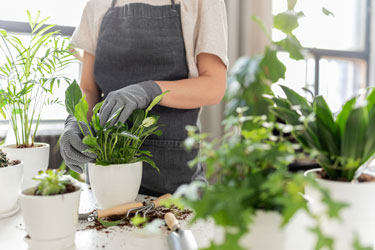
As a new plant parent, bringing a gorgeous green baby home from the garden centre comes with certain trepidation - how long will it stay so green and gorgeous? Initially the right amount of light, food and water will maintain that youthful vibrance are. But sooner or later all container plants need repotting and it’s amazing to see what fresh potting mix can do for a plant.
Some plants benefit from repotting every year. Others can wait longer. Poor growth and yellowed foliage are clear signs it’s time to repot. Old potting mix lacks useful nutrients and after years of watering, contains a build up of less than useful (or toxic) chemicals.
Also, watering is infinitely more effective after a repot, because old potting mix clogged with overgrown roots will actually repel water. Freeing up the roots and supplying them with fresh soil will ensure the plant can access the water it needs to support lush healthy growth.
Most indoor plants are tough and can be surprisingly forgiving. When we over water from time to time most recover and carry on, but the dead and damaged roots we can’t see can become an entry point for opportunistic fungus diseases. Removing dead black roots at repotting time stimulates fresh young roots and prolongs the plants life.
Whether you want them to grow bigger or not, plants that are actively growing in fresh potting mix are both stronger and more beautiful than those languishing in old potting mix.
Another reward from repotting can be the opportunity to create more plants for you and your friends. Many different houseplants can be divided into two or three smaller ones. Other produce ‘pups’ which can be removed and reported as baby houseplants.
The best time to repot
In spring, as the temperature warms and daylight increases, plants respond with active growth spreading their roots in search of nutrients into any available space. Repotting is ideally in timed to take advantage of this spring and summer growth spurt. Spring is generally the best season for repotting for most plants, but realistically you can repot at any time of year and it is a great activity for a winter’s day. If repotting in winter when plant growth has slowed right down, be careful not to over-water. Place your repotted babies in a warm room (away from direct sunlight) to recover. Avoid repotting in high summer when the weather is very hot.
Choosing a pot
Repot into the next sized pot, measuring about 5cm more in diameter than the plant’s previous pot. Too much extra space results in excess potting mix acting like a cold wet blanket around your plants roots which can cause them to rot. If you don’t want your plant to grow larger, you can return it to the same pot with fresh potting mix.
Drainage holes are essential. Instead of a saver to catch the water, the pot with drainage holes can be placed inside a decorative pots without holes, but take care with watering. Because you can’t easily see the excess water (as you would if using a saucer) this can lead to overwatering. Ideally take plants out of their decorative pot to water them, replacing them once the excess water has drained away completely.
Choosing potting mix
Choose a good quality potting mix to suit your particular plant. These are blended with the right ingredients to provide the ideal balance of drainage and water holding capacity. There are specific potting mix formulations for the likes of orchids and succulents which have extra drainage requirements.
How to repot
- Water the plant thoroughly a day or two before repotting. Don’t repot when your plant is wilting.
- Remove the plant from the old pot as gently as possible. This will be more difficult for plants that have become root bound. For very root bound plants, sliding a knife around the perimeter to loosen the roots will help.
- Use your hands to loosen the rootball and shake off loose potting mix. Most indoor plants have tough and resilient roots but some are tougher than others. Take care not to damage the roots anymore than necessary.
- Use clean sharp scissors or secateurs to tim off dead (these are usually black or brown in colour) or damaged roots. If the roots are very root bound, growing around the shape of the pot in a tight mass, it is helpful to remove up to half the root volume from the bottom and sides of the rootball. This can also be done to make more space for fresh soil when potting back into the same size pot (see below).
- Place a layer of fresh new potting mix into the base of the new pot, so that the plant will sit about 2cm below the rim.
- Place the plant in the centre of the pot and add fresh potting mix around the side, using your hands a small trowel, or an old dessert spoon as a useful tool. Turn the pot as you go making sure to keep the plant in the centre and gently press down with splayed out fingers as you add each layer. Softly tapping the pot on the bench also helps to settle the potting mix and prevent air pockets.
- Water minimally to help settle the potting mix and then refrain from watering for a few weeks as the plant goes into recovery mode. After the shock of replanting, plants may appear to sulk, but avoid the temptation to water for at least a week (longer in winter) to give time for roots to heal. Plants should not need any extra feeding (apart from the slow release fertiliser than is in the potting mix) for a good few months after repotting.
Repotting into the same pot
Remove the plant from its pot and then remove up to a quarter of the old potting mix from around the roots. Tease out any matted roots, letting the old potting mix fall away. Use a sharp knife to remove any roots that are rotten or broken. If you remove a lot of root mass, its best to trim the top of the plant by about the same amount. Take the opportunity to wash the pot out before repotting your plant into fresh planting mix. Then water thoroughly.
Potting tips
- Before replanting in used pots, scrub them with soapy water to remove traces of pests and diseases.
- A piece of weed matting over the drainage hole helps keep potting mix in and bugs out.
- If using water crystals, pre-soak them to form a gel and then mix thoroughly into the potting mix. You can add slow-release fertiliser or wetting-agent granules at the same time.
- If a plant becomes dried out while you get around to planting, revive it by dunking it into a bucket of water (until the bubbles stop rising) before removing it from its nursery pot.
- When replanting into the new pot, allow a gap of a few centimetres between the potting mix and the top of the pot. This prevents water spilling over the sides at watering time. It also allows space for a finishing layer of decorative pebbles, which helps keep moisture in and weeds out.
- Generally it is a good idea to water a plant an hour or so before repotting it, but if your plant is tightly holding to its pot, letting it dry out slightly will help you get it out without breaking the pot.
Nutrition for indoor plants
Unlike those growing in their natural environment, plants in pots have no means of seeking out food for themselves and the nutrients in potting mix eventually get used up. When we feed them regularly, they give us their best and are far more resistant to pests and diseases with lush leaves and their best flowering.
The best time to feed is when plants are actively growing. For most plants this means spring and autumn feeding. The fertilisers we use for outdoor plants can be too strong for houseplants. It is best to choose a plant foods specifically designed for indoor plants.
Houseplant foods can be fast acting liquid fertilisers for a quick pick-me-up or longer-lasting or ‘controlled-release’ fertilisers that release their nutrients over many weeks or months. Nutrients are compressed inside a porous barrier that releases food in response to temperature or moisture to keep it more in step with plant growth.
Whichever type of plant food you choose it should be a ‘complete fertiliser’ for a balanced diet of nitrogen, phosphorous and potassium (NPK) plus essential trace elements. Too much of a particular nutrient over another can cause the likes burnt leaf tips and leggy growth. Specific needs do vary between plants, which accounts for the range of different plant foods on offer.
Location, location
If your well tended plant is looking sickly it may not be in the best spot. Yellow leaves, leggy growth, scorched leaves or leaves dropping from the plant are all potential signs of a plant thats too hot or cold, or getting the wrong kind of light.
It’s worth researching what conditions your plant likes best and try them out in different rooms until they seem happy. Plants from the tropics can be great for steamy bathrooms while others like an airy spot. Most house plants do best in bright indirect light. In winter when the angle of the sun is lower, you may need to move plants away from windows. Avoid putting plants too close to a heater. Wipe the leaves gently with a damp cloth to keep them free of dust which blocks plants breathing holes and also prevents the light penetrating the leaf surface.
Plants that love humidity around their leaves, can do well when sitting on a saucer of pebbles filled with water up the base of the pot (the roots should not be sitting in the water).
Avoiding pest and disease problems
Feed them well, but not too much. A well fed houseplant that is getting the right amount of water is less likely to attract pests and diseases than a sick one. Pale leaves are a sign that fertiliser is lacking.
Check for signs of pests. It’s much easier to control a pest outbreak before it gets out of hand. You may see the pest itself or you may notice symptoms. Mottled leaves may be a sign of mites or aphids. Sticky leaves (often visited by ants) are result from the honey dew excreted by aphids, mealy bugs or scale insects.
Move infested plants away from others away from others as soon as you detect a problem to prevent the pest or disease spreading though all your plants.
Keep it airy. Houseplants that are crowded together or sitting in clammy airless locations are more likely to attract problematic fungus diseases like moulds and mildews.

1-Jul-2021
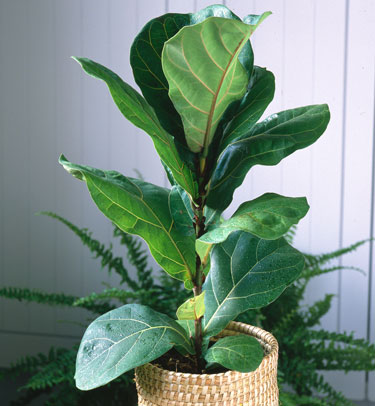
Fiddle Leaf Fig (Ficus lyrata) will need a bigger pot as it grows. Once a month, flush the soil with water and drain. This prevents build up of toxins in the soil to which these plants are sensitive.
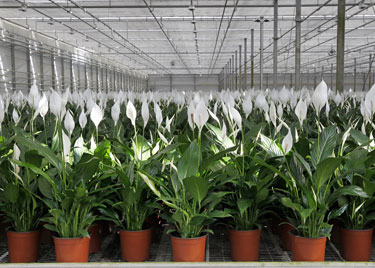
Peace Lily (Spathiphyllum) grown en masse in a nursery
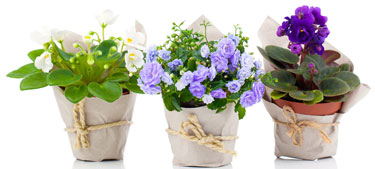
African Violets (Saintpaulia) need free draining soil
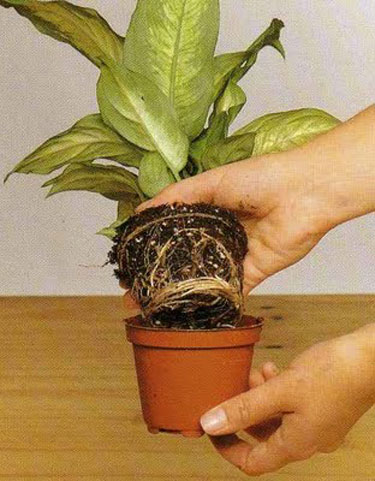
Roots circling the bottom of the pot are an indicator that the plant needs repotting.
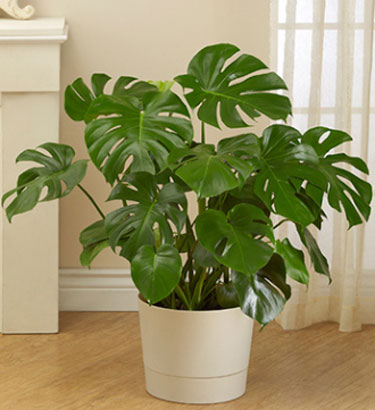
Fruit Salad plant (Monstera deliciosa)
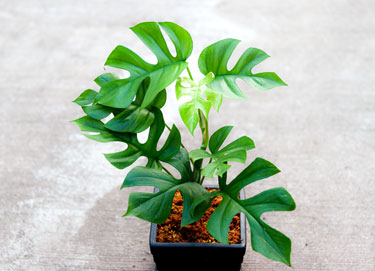
Rhaphidophora tetrasperma (Mini Monstera) is not a Monstera at all
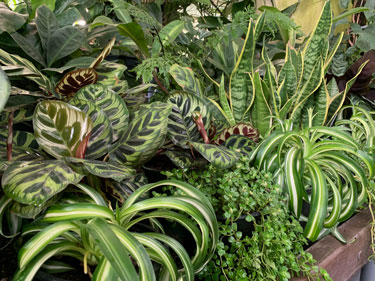
A collection of indoor plants including Never Never Plant, Spider Plant, Hen & Chicken Fern, and Mother-in-law's Tongue

